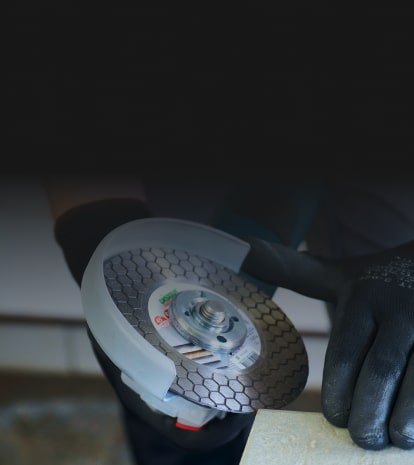
Core Drill Centring Guide
66 models
Sort:


Diamond drill
Diamond drill with micro impact
Centrator
32 - 180 mm
Core drill centring guide – an accurate hole from the first second
The hardest moment of dry core drilling is the start. The segments skid across the wall, the bit starts to vibrate and the edge of the hole gets chipped – unacceptable in a finished room. A core drill centring guide solves this problem: it holds the core bit exactly at the marked point and keeps it on axis until it has cut its own groove.
Why does the core bit slip at the start?
A core bit touches the wall only with the segments arranged around its rim. Until a ring-shaped groove is formed, nothing holds it in place – a slight sideways pressure is enough to make the bit "dance". With wet drilling or a drill stand the problem is smaller, but most installers work freehand and dry. In that case vibration not only damages the hole edge but also accelerates segment wear and loads the tool's bearings.
How does the centring guide work?
- Drill a 14 mm pilot hole with a carbide drill bit.
- Fit the centring guide onto the segments and insert its pilot pin into the hole.
- Pre-drill without hammer action to a depth of 4–8 mm.
- Remove the guide and continue drilling as usual.
The edge stays smooth and clean – even when you drill through wall tiles.
Centrator RS/RM-TX 62/72 for diamond core bits
Distar offers the Mechanic Centrator RS/RM-TX 62/72 – a centring guide for 62 and 72 mm diamond core bits, the most popular sizes for electrical boxes. It works with RS/RM-TX core bits, including the micro-impact version. You will find the full choice of bits in core drills for concrete, and dust extraction accessories in accessories for diamond core drills.
When is a centring tool useful?
- installing socket and switch boxes in finished walls;
- drilling through tiles without chipping;
- dry drilling without a drill stand;
- when the exact hole position relative to other installations matters.
A centring guide is a small expense that saves time on corrections and protects finished surfaces. It fits into any toolbox – it is light and needs no adjustment. You will especially appreciate it when drilling series of box holes that must sit on one line at equal spacing. Instead of patching crooked holes with mortar, you immediately get a ready seat for electrical fittings.
Drilling tips
Mark the centre of the hole with a pencil or a laser level and drill the pilot hole exactly perpendicular to the wall – the position of the whole hole depends on it. Start at lower speed, and once the groove is cut, increase to the speed recommended for the diameter. When drilling dry, connect a vacuum cleaner so that dust does not overheat the segments. After work, clean the centring guide and check that the pilot pin is not bent. A well-kept guide stays accurate for hundreds of holes.
Distar tools for installers
Distar has been manufacturing core bits, blades and diamond accessories since 1994. The centring guide was designed together with our core bits, so it fits the segments perfectly and ensures a stable start. Order directly from the manufacturer – with a warranty and delivery across Europe.
Frequently Asked Questions
Which core bits does the centring guide fit?
Centrator RS/RM-TX 62/72 is designed for RS/RM-TX diamond core bits with diameters of 62 and 72 mm, including micro-impact versions.
What drill should I use for the pilot hole?
Drill the pilot hole with a 14 mm carbide drill bit – the pin of the centring guide fits this diameter.
How deep should I drill with the centring guide?
Pre-drill without hammer action to a depth of 4–8 mm, then remove the guide and continue drilling normally.
Is a centring guide useful when drilling through tiles?
Yes. Without it the segments slip on the glaze and chip the edge. With a centring guide the hole edge stays smooth and clean.
Can I extract dust when drilling with a centring guide?
Yes. After the start, remove the guide and fit a dust collector – for example SocketDUSTER 68-82 or a DrillSTREAM adapter connected to a vacuum cleaner.